Sunday, February 28, 2010

Preplanning your pages

Over the years, I have figured out that it is easier for me to "lay pages out" one day and actually do them on another. I can spend an hour just picking the paper for a page. If I can lay out several pages at a time, then on the day that I actually crop, I get way more pages done! I know that this would have worked better in a video, but I do not have a camera, so I will try by posting the pictures.

I use a Creative Memories Layout box, but you can use any type of 12x12 (or your album size) box that you have. You can see the box and the layout page next to it and some of my idea books behind it.
Next, I lay down the layout page, mine are white and the size of a 12x12 page, they come with the box. Once again, you can use whatever you have that is the correct size. I used to use actual pages; if you do that, please remember that the right side of your page will be the left side on the next 2 pages. I pull out my pictures, then find the paper that I want to use with them. I then write myself a note about the page.
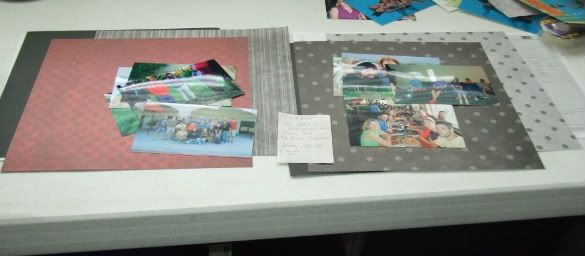
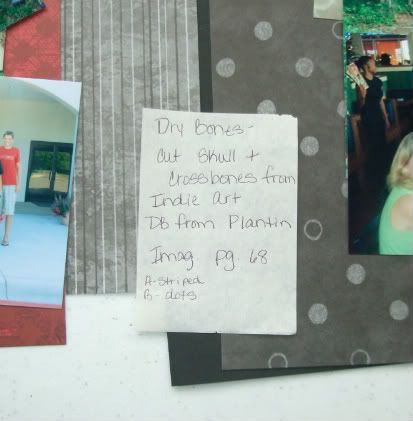
I make notes about the page. On the note in the picture, I put what the title would be, what cartridge to cut it from and I want to use a page in one of my CTMH idea books to cut the paper by.
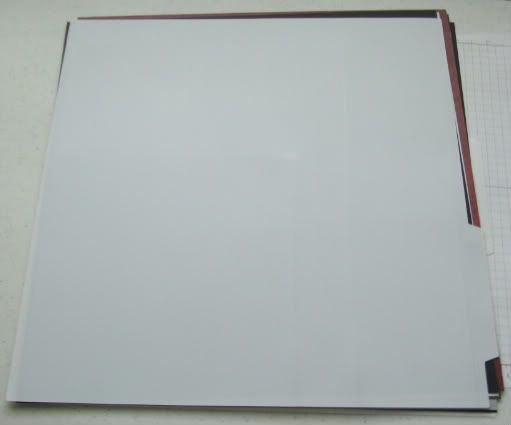
Once I am done, I fold the two pages in on top of each other. That way everything I need is all together.
This next page was just a one page layout. I do the same, except it will have a top and bottom layout page . On this page I want to use a sticker as my title, so I wrote that on my note and put the sticker sheet in with the paper and pictures.
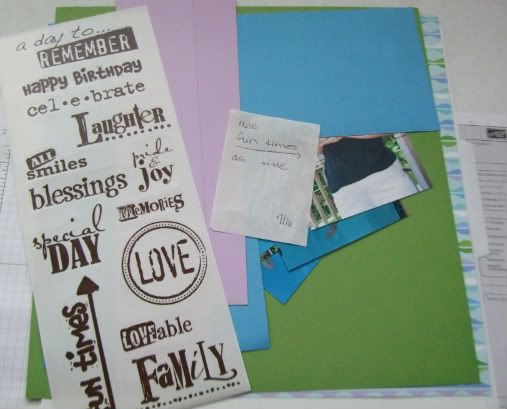
I laid out 6 pages today, here is what my stack looked like . You put the pages in order from top to bottom.
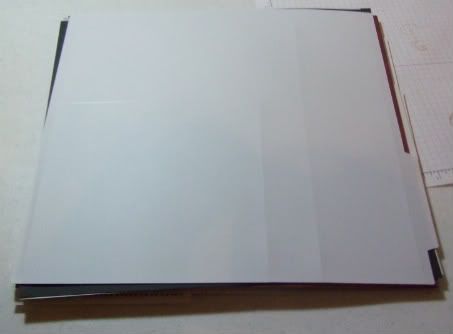
Here is a picture of the box with the pages in it. I have enough layout pages to layout 30 pages at a time. That is about max capacity of this box. The only time I lay out that many pages, is when I am going on a retreat!
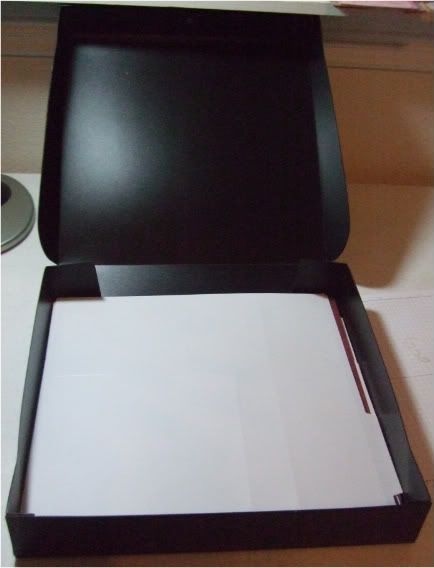
How you lay out your pages is up to you. I know people who do everything except the adhesive and journaling. I sometimes cut my title or image out, but now that I have the Gypsy, I am much more likely to put the image into my Gypsy so that all I need to do is cut the image once I am there. I also decide about the journaling box after I have cut the paper and cropped the pictures. I use the backside of the note paper to write out what I want to say in the journaling box and then transfer that onto the jb. There is no right and wrong way to do it. Whatever works best for you, is the right way! Hope this helps you!
Saturday, February 27, 2010

Non Traditional Colors

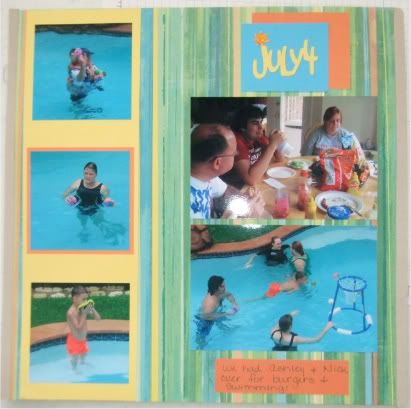
I am one of those people that match my paper to the colors that are in my pictures. Sometimes that means using very non traditional colors for certain events. I did this page on Friday. It is July 4th from 2007 (remember, I am BEHIND!) As you can see, I did not use red, white, & blue. I used green, blue, yellow, and orange! I also used just a scrap of the orange as the journaling box on this page. I cut the title with Designer's Calendar and then used orange Stickles to give the top of the J some sparkle! The patterned paper is SandyLion and all the cardstock is CM.


Friday, February 26, 2010

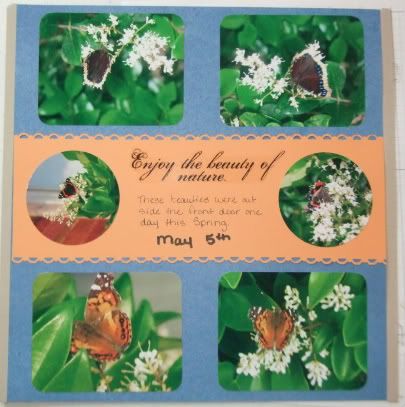
Nature Page

I very seldom take pictures of nature. Even if I take the pictures, I can't always get them to "fit" into my albums. I took these pictures of butterflies that were in our yard one day. Every once in a while, we need to enjoy the small things! The punch is SU and everything else is CM.


1,000 Hits

Yay! I noticed this morning that over night my blog went over the 1,000 hit mark! I am very excited that you decided to look at my blog! Thanks for stopping by; please come back again! Please leave me a comment every now and then!

Thursday, February 25, 2010

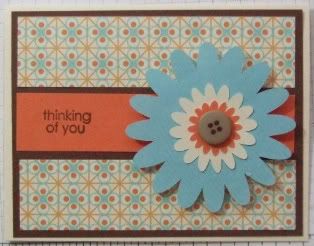
Challenge Card

Here is a card that I made today! (I found my MOJO!! Woo Hoo!) I made it thinking that it would work for both the color challenge and the card sketch challenge over on Paper Crafting Mania, but I think that for the color challenge I was supposed to have 2 colors of blue. But, I tried! The brown and cream cardstock are from the Paper Studio, the blue and orange are CM, and the printed is K & Co. The ink is chocolate chip from SU and the stamp is CTMH.


Wednesday, February 24, 2010

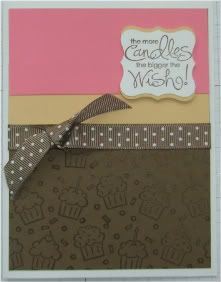
Simple Card

Sorry it has been so long since I updated! I must have left my mojo in Austin over the weekend! Here is a very simple card that I made at an SU 4 for $5 class a couple of weeks ago. We tend to think that the more elobarate, the better the card (or at least I do), but that is not always the case. Simple can be very pretty!


Wednesday, February 17, 2010

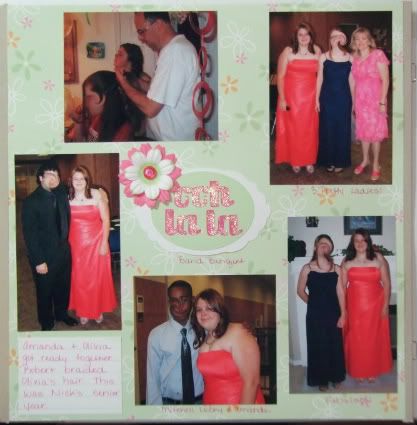
Color Challenge

I did this page for last week's color challenge over on Paper Crafting Mania. I used a non traditional title for this page using my new Forever Young cartridge! In the past year I scrapbooked all of Amanda's high school years, so I have already done this banquet in her album. This one is for the family album; and it is the 6th band banquet page I have done, so I was looking for something different!

The background and white cardstock are from the Paper Studio. The green cardstock and flower is CM. The pink flower came from my local scrapbook store and the pink rhinestone is from Michaels. I used Crystal Stickles to make my title glittery.

Do you see my husband fixing the one girl's hair for the banquet?


Tuesday, February 16, 2010

Lots of Pictures!

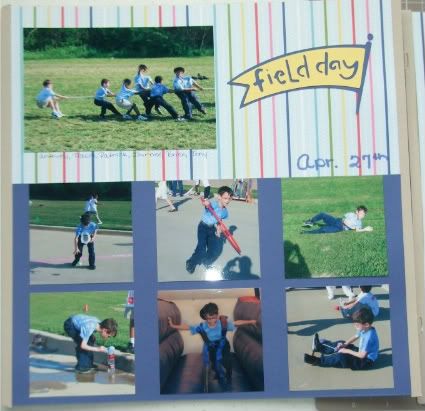
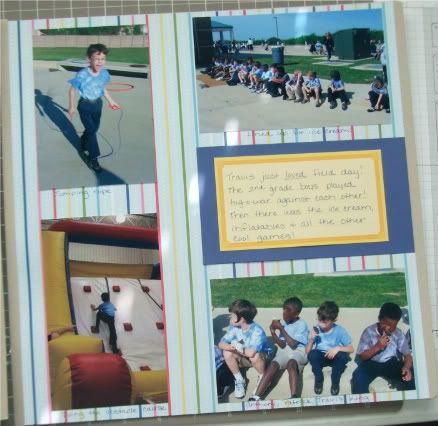
If you are anything like me, then you take LOTS of pictures! When it came time to do these field day pages I found that I had several pictures that were taken from far away and Travis was small in the picture. So, I decided to do something that I've never done before, I cut six of them all the same size and put them all on one page! I must admit that it turned out well (not sure about the way I did the paper, but the pictures look good!) I cut all the pictures 3x3. This was a little tricky because the photos were all 4x6 to begin with. I used my CM photolabeling pencil and a ruler to "mark" the photo where I wanted it cut. Then I trimmed it using my CM personal trimmer. This did take a while to be able to cut them this way. Then on the opposite page, I put regular sized pictures! I almost always trim my pictures some. This way you can crop out any distractions in the pictures. Once again, I seem to be camera illiterate! The individual pictures turned out better; that is why you get two pictures today!


I used Locker Talk to cut the title. The cardstock is CM. I forgot to look to see who made the patterned paper! (My bad.) The journaling box is also CM.


Monday, February 15, 2010

Pages That Make You Giggle!

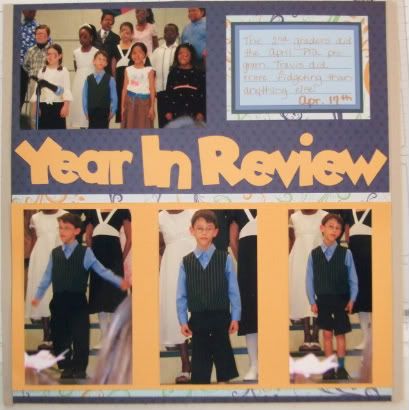
Remember my post back in January where I talked about scrapping the good and the bad? Well, you also have to scrap the amusing! This is a page of Travis' 2nd grade PTA program. He did more fidgeting than anything else, but he's mine and I love him! All of this paper is DCWV. The journaling box is CM. The title is cut with Mickey Font and then welded together with my Gypsy.


Sunday, February 14, 2010

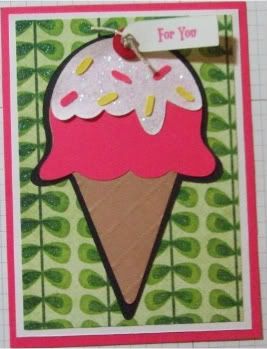
Card made with Sweet Treats

I got the idea of this card from the Holidays with the Cricut blog. It is made using the Sweet Treats cartridge. I wanted glitter paper for the white topping, but I didn't have any. I cut my layer out of my white cardstock and then I used Crystal Stickles to make it glittery. I spread the Stickles with a paint brush to get it on thin enough. The green paper is My Mind's Eye and the rest is CM. I used the Sweet Treats cart to cut the tag also and then stamped it with a SU stamp and ink. The button is from my stash.


Saturday, February 13, 2010

Ashley's Card

This is another one of my cards from a SU class. This one went to Ashley. She is Amanda's friend and we just treat her like a daughter. (No, I didn't forget Travis. He is getting the card that I scraplifted!) All products are SU.

.

Friday, February 12, 2010

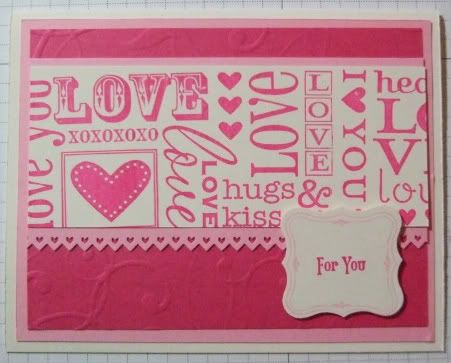
Valentine Card

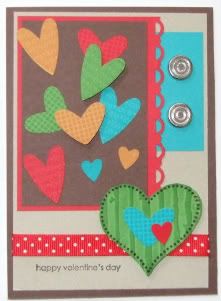
Here is another Valentine card that I made at a SU class. Everything used is SU.


More Snow Pictures

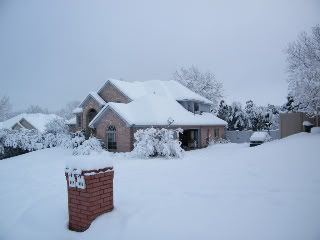
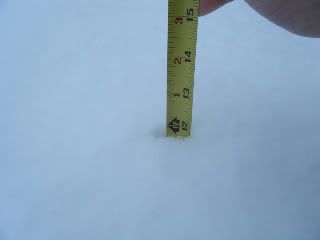
Here are the final snow pictures! It quit snowing last night around midnight. It is now above freezing and everything is melting.

Here is the final measurement.


Penny had fun even though the snow was taller than her!


Thursday, February 11, 2010

Amanda's Card

This was another card that I made the other night at my SU Demos house. Both Amanda and Travis' favorite color is red. This card will work well for either one, but Amanda saw it and laid claim to it! All products except the brads are SU. The heart brads came from JoAnns.

Snow Update: We are now at 7" in Cedar Hill!

It's SNOWING!

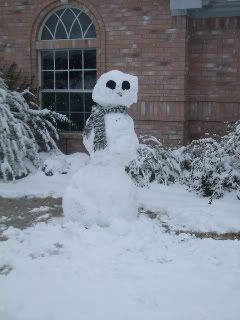
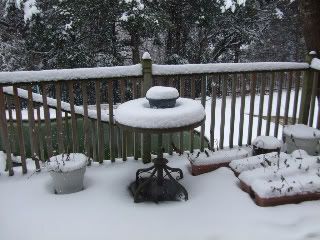
We don't get snow very often and usually we get some form of ice, but today we have snow! It's been snowing since about 4-5 this morning! (We never get it for that long!) As of 2 p.m. we have 4" of accumulation! (I've lived in Texas my whole life and I don't ever remember getting this much snow!) I thought I'd share some of the pictures!

This was our house about 7 this morning!
This is the snowman we built!

This is the back deck about 1:30.
We tried to take Travis to school this morning. This was one of the two buses that had slid off the road. Both buses were less than a block from my house. We turned around and went back home! Don't know if they ever got the buses moved!


Wednesday, February 10, 2010

Robert's Card

I know, I haven't posted anything in about a week. I apologize for that. I haven't done anything! But, last night I made some Valentine Cards. This is one that I made and thought I'd give to Robert. (Hopefully he doesn't read my blog!) I went over to my SU demos house for her monthly crop night. She had this idea in her stack of cards. All products except the ribbon are SU.

I'll have all Valentines cards until Sunday!

Wednesday, February 3, 2010

Scraplifted Valentines Card

This is a card that I scraplifted off the Mojo Monday website. The card that I copied was made by Stampin' Up Demonstrator Mary Fish. When I looked at her card, not only did I LOVE it, but I realized that it used the stamp set that I had just gotten yesterday! She used all SU products on her card, but I used what I had. My blue and cement color are CM. The green came out of my scrap box and the ribbon is some I got at Hobby Lobby. All the other papers are SU. The stamps are SU and the ink is SU and VersaMark. The brads are also SU.

If you aren't familiar with Mojo Monday, every Monday they post a card sketch. You have all week to do it and can even link your card to their website so others can see it. I enjoy looking at the new sketches and seeing what other people can do. You should check it out!

Tuesday, February 2, 2010

Titles

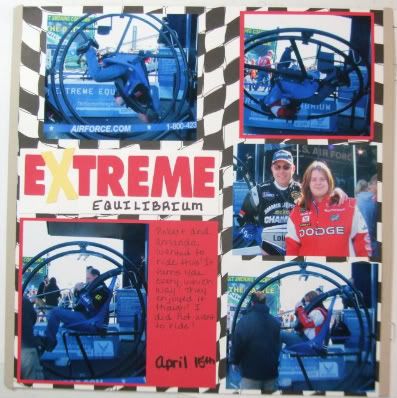
I have another race page for you today. For those of you who have never been to a NASCAR race; it's kind of like being at the fair, only everything is FREE!
I wanted to title this page the name of the ride, but it was a little too long. I tried something that I had seen in a magazine-I used both cut letters (or stickers) and handwriting. I was pleased with the way it turned out! I used Graphically Speaking for the Extreme and a Sharpie to write the word Equilibrium. I also improvised on the journaling box. I wanted to journal, but there was no room for a jb, so I compromised and made the mat for the picture larger and used part of the mat as the jb. The printed paper is Moxxie and the cardstock is the Paper Studio and CM.


Monday, February 1, 2010

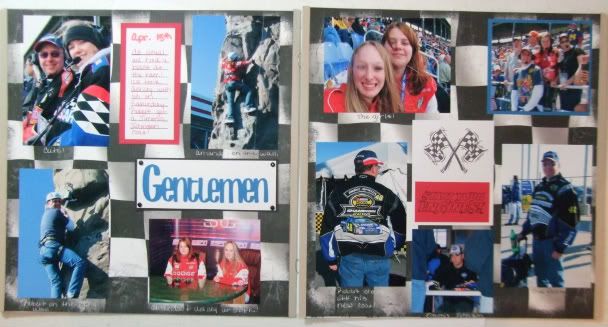
Layout Challenge

I did this layout today for a Layout Challenge over on Paper Crafting Mania! We have season tickets to Texas Motor Speedway. Finding a new way to layout the pages is always a challenge! I used Don Juan on the Gentlemen. The stamps and ink are CTMH. The black & white printed paper is Karen Foster. The cardstock is CM and The Paper Studio. Once again, I made my own journaling box!